Controlsクラスを使用してインタラクティブなMQL5ダッシュボード/パネルを作成する方法(第1回):パネルの設定

はじめに
この記事では、MetaQuotes Language 5 (MQL5)のControlsクラスを使用してインタラクティブなダッシュボードを作成します。レイアウト構造により、ダッシュボードの外観と基本機能が決まり、より複雑なパネル操作のコアフレームワークとして機能します。この設計の本質は、トレーダーにとって取引体験をよりクリーンで、より高速で、より直感的なものにするためには何が必要かを考え抜くことです。この記事を読み終えると、MetaTrader 5チャートにタイトル、ナビゲーションボタン、それぞれのアクションボタンを備えた基本的なダッシュボードが作成され、ダッシュボードを自分用に活用できるようになります。
メインナビゲーションパネルには、[Trade]、[Close]、[Information]の3つのボタンがあります。各セクションには、さまざまなコマンド用の専用コントロールがあります。たとえば、[Trade]セクションには、取引量、価格、ストップロス(SL)、テイクプロフィット(TP)、買い、売り、買いストップなどの様々な注文のボタンがあります。[Close]セクションには、[Close All Profit]や[Close All Pending Orders]などのオプションを含むパネルを閉じるためのボタンがあります。[Info]セクションには、重要な取引データとステータスの更新が表示されます。この記事は、次の3つの主要部分に分かれています。
- 要素イラストレーション
- MQL5でGUIパネルを組み立てる
- 結論
この旅では、MetaEditorの主要な統合開発環境(IDE)コーディング言語としてMetaQuotes Language 5 (MQL5)をMetaEditorで広範囲に使用し、洗練された取引アプリケーションとインターフェイスを作成できるようにします。MetaTrader 5取引端末内で直接プログラムを実行し、リアルタイムの市場データを監視し、取引プログラムとシームレスにやり取りできるようになります。したがって、互換性を確保し、利用可能なすべての機能にアクセスできるようにするには、MQL5とMetaTrader 5の両方の最新バージョンをインストールすることが重要です。準備が整ったら、インタラクティブな取引パネルの作成を始めましょう。
要素イラストレーション
ここでは、トレーダー向けに設計されたインタラクティブGUIパネル/ダッシュボードの主要コンポーネントについて説明します。パネルはいくつかの重要な要素で構成され、それぞれが取引効率を高めるための特定の目的を果たします。ここでは、3つの主要なナビゲーションボタンに焦点を当てます。[Trade]、[Close]、[Information]にはそれぞれアクションボタンが装備されています。
[Trade]セクションには、取引量、価格、ストップロス(SL)、テイクプロフィット(TP)のボタンのほか、買い、売り、買いストップなどの実行ボタンが表示されます。[Close]セクションには、[Close All Profit]や[Close All Pending Orders]などの機能が含まれ、重要な取引管理ツールにすばやくアクセスできるようになります。最後に、[Info]セクションには、口座残高、証拠金レベル、リアルタイムの市場更新などの重要な取引データが表示されます。
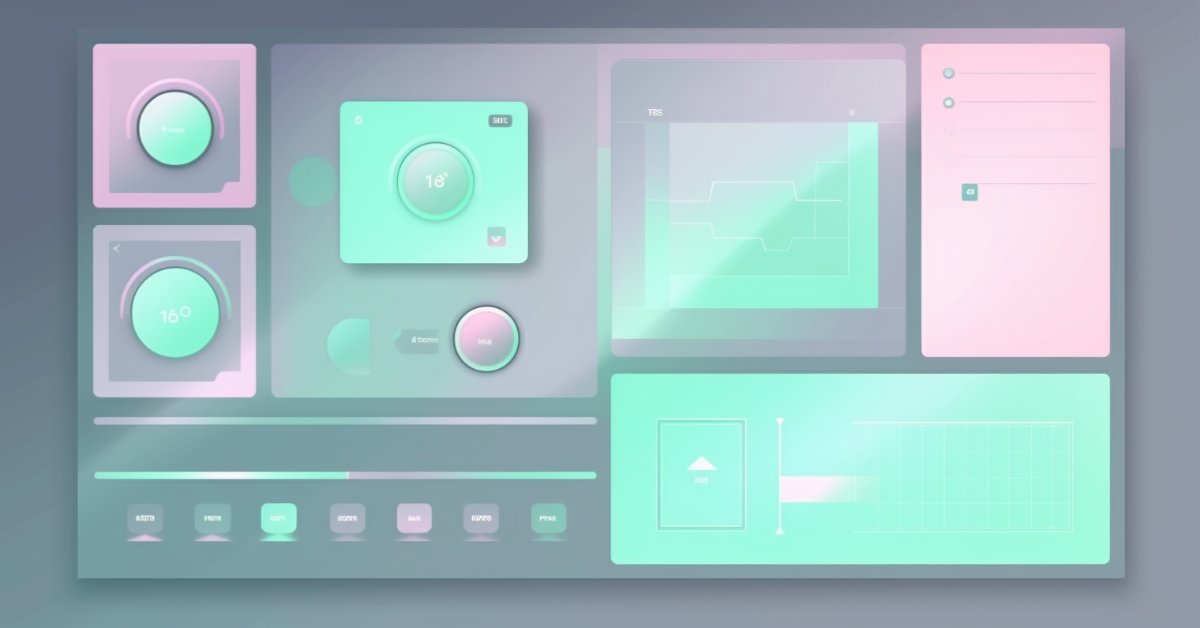
これらの要素を視覚的に表現するために、これらのコンポーネントがパネル内でどのように配置されるかを示すレイアウト図を提供します。この図は、この記事の後のセクションでGUIを構築するためのロードマップとして機能し、これらの要素を統合してまとまりのあるユーザーフレンドリーなインターフェイスを作成するためのガイドとなります。完全なイラストは次のとおりです。

MQL5でGUIパネルを組み立てる
パネルを作成するために、エキスパートアドバイザー(EA)を基にします。 EAを作成するには、MetaTrader 5端末で[ツール]タブをクリックし、[MetaQuotes言語エディタ]を選択するか、キーボードのF4を押します。または、ツールバーのIDE(統合開発環境)アイコンをクリックすることもできます。これにより、自動売買ロボット、テクニカル指標、スクリプト、関数のライブラリを作成できるMetaQuotes言語エディタ環境が開きます。

MetaEditorを開いたら、ツールバーの[ファイル]タブで[新しいファイル]を選択するか、CTRL + Nキーを押して新規ドキュメントを開きます。または、[ツール]タブの新規アイコンをクリックすることもできます。MQLウィザードのポップアップが表示されます。

ウィザードが表示されたら、[EA(テンプレート)]を選択し、[次へ]をクリックします。

EAの一般プロパティで、[名前]フィールドにEAのファイル名を入力します。フォルダが存在しない場合にフォルダを指定または作成するには、EA名の前にバックスラッシュを使用することに注意してください。例えば、ここではデフォルトで「Experts\」となっています。つまり、私たちのEAはExpertsフォルダに作成され、そこで見つけることができます。他のフィールドはごく簡単ですが、ウィザードの一番下にあるリンクから、正確な手順を知ることができます。

希望するEAファイル名を入力した後、[次へ]をクリックし、[完了]をクリックします。これらすべてを実行すると、GUIパネルをコーディングしてプログラムする準備が整います。
新しいプログラムのデータセットには、デフォルトで、ファイルにリンクされている必要なプロパティを示すメタデータが表示されます。カスタマイズすると、次のメタデータが存在します。
//+------------------------------------------------------------------+
//|                                         CONTROL PANEL PART 1.mq5 |
//|                           Copyright 2024, Allan Munene Mutiiria. |
//|                                     https://forexalgo-trader.com |
//+------------------------------------------------------------------+
#property copyright "Copyright 2024, Allan Munene Mutiiria." //--- Set copyright information
#property link      "https://forexalgo-trader.com"            //--- Link to the author's website
#property version   "1.00"                                    //--- Version of the script
ここから最初におこなう必要があるのは、パネルまたはダッシュボードを作成できるようにするデフォルトのMQL5カスタムライブラリにアクセスすることです。すでにクラス別に整理されており、パネルの作成が容易になります。使用するファイルは、IncludeフォルダとControlsサブフォルダに整理されています。アクセスするには、指定されたフォルダに移動して開くだけです。具体的には、以下のようになります。

ファイルを表示した後、最初におこなう必要があるのは、ファイルのプロパティやその他のユーティリティにアクセスできるように、ファイルをプログラムに組み込むことです。最初におこなうことは、ボタンファイルをインクルードすることです。これは次のロジックによって実現されます。
#include <Controls/Button.mqh> //--- Include button control library
このセクションでは、グラフィカルユーザーインターフェイス(GUI)コントロール用のMQL5標準ライブラリの一部である「Button.mqh」ライブラリを使用します。このライブラリを使用すると、CButtonクラスにアクセスでき、これを使用して取引パネルのボタン要素を作成、構成、管理できます。また、ナビゲーションボタン、取引アクションボタン(売買注文を実行するためのボタンなど)、およびボタンをGUI要素として使用することでメリットを得られるその他のパネルコンポーネントなど、さまざまなインタラクション目的に対応するパネルボタンを実装できます。プログラムをコンパイルすると、以下に示すように、プログラム内にいくつかの追加のファイル拡張子があることがわかります。

ファイルが正しく追加されたことを確認できます。これにより、クラスメンバーにアクセスし、パネルのメイン背景ホルダーのフレームを作成できるオブジェクトを作成できるようになりました。これは次のロジックによって実現されます。
CButton obj_Btn_MAIN; //--- Main button object
ここでは、obj_Btn_MAIN変数をCButtonクラスのインスタンスとして宣言します。これは、obj_Btn_MAINがプログラム内でボタンオブジェクトとして機能することを意味します。このボタンオブジェクトを作成することにより、インターフェイス内のメインボタン要素を表現および操作するためのメモリ領域が本質的に予約されます。CButtonクラスは、ボタンのラベル、サイズ、色の設定や、クリックイベントの処理など、ボタンコントロールを作成、カスタマイズ、管理するためのさまざまなメソッドとプロパティを提供します。これで、EAが初期化されるとき、つまりOnInitイベントハンドラでボタンの作成に進むことができます。
//+------------------------------------------------------------------+
//| Expert initialization function                                   |
//+------------------------------------------------------------------+
int OnInit() {
   //--- Start of the initialization function

   //--- MAIN BUTTON
   obj_Btn_MAIN.Create(0, Btn_MAIN, 0, 30, 30, 0, 0); //--- Create the main button at specified coordinates


   //--- End of initialization function
   return(INIT_SUCCEEDED); //--- Return initialization success status
}
ここでは、EAが最初にチャートにアタッチされるか再初期化されるときに自動的に呼び出される関数であるOnInitイベントハンドラで、ダッシュボードのメインボタンを作成します。このオブジェクトをobj_Btn_MAINと呼び、ドット演算子を使用してすべてのクラスメンバーにアクセスします。ドット演算子を使用すると、次のようになります。

Createは、選択して必要なパラメータを提供するメンバー関数です。すべての意味を明確に理解するために、パラメータを分解してみましょう。
- 最初のパラメータ(0)はチャートIDを指定します。値0は、EAが実行されている現在のチャートを参照します。
- 2番目のパラメータ(Btn_MAIN)は、このボタンの名前を表す定義済みの文字列定数です。この名前は、プログラムの他の部分でボタンを参照するために使用されます。参照しやすくするために、グローバルスコープで次のように定義しました。
//--- Define button names for easier reference
#define Btn_MAIN "Btn_MAIN"                                   //--- Button name for the main button
- 3番目のパラメータ(0)はサブウィンドウのインデックスを参照します。ここで、0はボタンをメインチャートウィンドウに配置することを示します。
- 4番目(30)と5番目(30)のパラメータは、それぞれボタンのX座標とY座標を設定します。これらはチャート上のボタンの位置を決定します。
- 最後の2つのパラメータ(0と0)は、ボタンの幅と高さを定義します。この場合、値0はボタンがデフォルトの寸法を使用することを意味します。これを以下に図示します。

プログラムを実行すると、次の出力が得られます。

画像から、最初の座標は30ピクセルと30ピクセルに設定されていることがわかりますが、2番目の座標は0のままにしているため、0として表示されます。したがって、2番目の座標は原点(0,0)にマッピングされます。2番目の座標を設定するには、いくつかの方法があります。1つ目は、メンバー関数内で直接定義することです。
   //--- MAIN BUTTON
   obj_Btn_MAIN.Create(0, Btn_MAIN, 0, 30, 30, 310, 300); //--- Create the main button at specified coordinates
ここで、ボタンの2番目の座標を定義します。x軸とy軸にはそれぞれ310ピクセルと300ピクセルを使用します。明瞭性を高めるために、黄色で強調表示もおこなっています。実行すると、次の出力が得られます。

期待通りの結果が得られました。ただし、この方法を使用する場合は、2番目の座標が最初の座標とまったく関係がないため、ピクセルを定義するときに注意する必要があります。したがって、すべてのピクセルは原点から参照されるため、深い数学を実行する必要があります。たとえば、定義された2番目の座標が10と10の場合、ボタンの2番目の座標は、原点から10ピクセル離れたy軸とx軸の両方に設定されます。したがって、ボタンは逆方向にマッピングされ、サイズは(30-10 = 20) 20ピクセルになります。ここにイラストがあります。

最初の方法に伴う数学的なストレスを回避するために、最初の座標から直接計算されるボタンの高さと幅を定義する2番目の方法を使用できます。以下のロジックが使用されます。
   //--- MAIN BUTTON
   obj_Btn_MAIN.Create(0, Btn_MAIN, 0, 30, 30, 0, 0); //--- Create the main button at specified coordinates
   obj_Btn_MAIN.Width(20); //---  Set width of the main button
   obj_Btn_MAIN.Height(20); //---  Set height of the main button
ここでは、widthおよびheightメンバー関数を使用してボタンのサイズを設定します。違いがわかるように、均一な20ピクセルのサイズを使用しました。プログラムをコンパイルすると、次の結果が得られます。

図から、ボタンが前方方向にマッピングされていることがわかります。つまり、開始点を定義するときに2番目の座標を強調する必要はありません。ポイントを直接定義する3番目の方法もさらにあり、幅と高さのパラメータを組み合わせることでスペースを節約できます。コードスニペットは以下のとおりです。
   //--- MAIN BUTTON
   obj_Btn_MAIN.Create(0, Btn_MAIN, 0, 30, 30, 0, 0); //--- Create the main button at specified coordinates
   //obj_Btn_MAIN.Width(310); //--- (Commented out) Set width of the main button
   //obj_Btn_MAIN.Height(300); //--- (Commented out) Set height of the main button
   obj_Btn_MAIN.Size(310, 300); //--- Set size of the main button
ここでは、ボタンのサイズを直接設定します。ただし、ボタンの背景色と境界線の色を設定する必要があります。
   obj_Btn_MAIN.ColorBackground(C'070,070,070'); //--- Set background color of the main button
   obj_Btn_MAIN.ColorBorder(clrBlack); //--- Set border color of the main button
ここでは、背景色と境界線の色を設定して、obj_Btn_MAINボタンの外観を構成します。まず、obj_Btn_MAINオブジェクトのColorBackgroundメソッドを呼び出し、RGB値「C'070,070,070'」をパラメータとして渡します。RGBは、赤、緑、青の略で、デジタル画面上で幅広い色域を生成するために使用される3つの原色です。
RGB形式は、0から255の範囲で赤、緑、青の強度を表す3つの値を取ります。ここで、0は強度がないことを意味し、255は最大強度を意味します。たとえば、「C'070,070,070'」は以下を意味します。
- 赤の成分を70(255中)に設定する
- 緑の成分を70に設定する
- 青の成分を70に設定する
3つのRGB値をすべて同じに設定すると、結果の色はグレーの色合いになります。3つすべてに中程度の値70を使用しているため、ボタンの背景は中程度の濃いグレーになります。この色は視覚的にニュートラルなので、作成する他の明るい色の要素がパネル上で目立つようになります。
次に、ColorBorderメソッドを呼び出し、純粋な黒を表すclrBlack定数を使用して色を設定します。ここで、各RGB値は0(「C'000,000,000'」)であり、赤、緑、青のコンポーネントが存在しないことを意味します。境界線に黒を使用することで、視覚的なアウトラインが強調され、暗い灰色の背景に対してボタンの境界が明確に定義され、よりすっきりと構造化された外観になります。このアプローチにより、ボタンを簡単に区別できるようになり、グラフィカルインターフェイス全体の外観が洗練されます。コンパイルすると、次の出力が得られます。

そこにメインボタンがあります。最後に、更新に影響する手動チャートイベントを待つのではなく、変更が自動的に有効になるようにチャートを更新する必要があります。採用されたロジックは次のとおりです。
ChartRedraw(0); //--- Redraw the chart to update the panel
ここでは、ChartRedraw関数を呼び出して、チャートインターフェイスを更新し、視覚的に更新します。これは、新しく追加されたすべてのグラフィカル要素(ボタン、ラベルなど)が適切に表示されるようにするためです。ChartRedraw関数は、端末に現在のチャートを再レンダリングさせるため、チャート要素を追加、変更、または削除するときには不可欠です。これは、インタラクティブなパネルを作成し、パネルがユーザーに表示できる最新の状態を表示していることを確認したい場合に特に重要です。
関数を呼び出すときにパラメータ0が使用されます。チャートIDです。MetaTrader 5のすべてのチャートには一意のIDがあり、0はEAが接続されている現在のチャートを参照します。チャートを再描画するには、正しいIDを渡す必要があります。再描画操作がこの特定のチャートに適用されることを確認しています。ChartRedraw関数を呼び出さないと、グラフィックの問題が発生する可能性があります。新しく作成されたグラフィカルオブジェクトが表示されない場合があります。また、変更されたグラフィカルオブジェクトに変更内容が反映されない場合があり、古いプロパティが引き続き表示されます。したがって、そのパネルのChartRedraw関数を呼び出すことで、パネルとそのコンテンツが正しく表示されていることを確認できます。メインボタンの作成を担当する最終的な初期化コードは次のとおりです。
//+------------------------------------------------------------------+
//| Expert initialization function                                   |
//+------------------------------------------------------------------+
int OnInit() {
   //--- Start of the initialization function

   //--- MAIN BUTTON
   obj_Btn_MAIN.Create(0, Btn_MAIN, 0, 30, 30, 0, 0); //--- Create the main button at specified coordinates
   //obj_Btn_MAIN.Width(310); //--- (Commented out) Set width of the main button
   //obj_Btn_MAIN.Height(300); //--- (Commented out) Set height of the main button
   obj_Btn_MAIN.Size(310, 300); //--- Set size of the main button
   obj_Btn_MAIN.ColorBackground(C'070,070,070'); //--- Set background color of the main button
   obj_Btn_MAIN.ColorBorder(clrBlack); //--- Set border color of the main button


   ChartRedraw(0); //--- Redraw the chart to update the panel

   //--- End of initialization function
   return(INIT_SUCCEEDED); //--- Return initialization success status
}
ここまでで、これからおこなうことの基礎的な背景と、実行しなければならない必要な事項がわかりました。したがって、初期インターフェイスに必要なすべてのボタンのオブジェクトを定義できます。
#include <Controls/Button.mqh>                                 //--- Include button control library
CButton obj_Btn_MAIN;                                       //--- Main button object
CButton obj_Btn_HEADER;                                     //--- Header button object
CButton obj_Btn_X;                                          //--- Close button (X) object
CButton obj_Btn_TRADE;                                     //--- Trade button object
CButton obj_Btn_CLOSE;                                      //--- Close button object
CButton obj_Btn_INFO;                                       //--- Information button object
CButton obj_Btn_RISK;                                       //--- Risk button object
CButton obj_Btn_POINTS;                                     //--- Points button object
CButton obj_Btn_SELL;                                       //--- Sell button object
CButton obj_Btn_ENTRY;                                      //--- Entry button object
CButton obj_Btn_BUY;                                        //--- Buy button object
CButton obj_Btn_SELLSTOP;                                   //--- Sell Stop button object
CButton obj_Btn_BUYSTOP;                                    //--- Buy Stop button object
CButton obj_Btn_SELLLIMIT;                                  //--- Sell Limit button object
CButton obj_Btn_BUYLIMIT;                                   //--- Buy Limit button object
CButton obj_Btn_FOOTER;                                     //--- Footer button object
ここでは、パネルのさまざまなインタラクティブ要素を表すために、CButtonクラスを使用して残りのボタンオブジェクトを複数定義します。各行は一意のボタンオブジェクトをインスタンス化し、作成する必要があるダッシュボードのさまざまなセクションの基礎構造を設定します。各ボタンの目的と役割を詳しく見てみましょう。
- obj_Btn_HEADER:このオブジェクトは、パネルのヘッダボタンを表します。タイトルやアイコンを表示したり、パネルの上部セクションの視覚的な区切りとして使用したりできます。
- obj_Btn_X:このボタンは「閉じる」ボタン(多くの場合[X]と表示)として機能し、ユーザーがパネルを終了したり非表示にしたりできるようにします。
- obj_Btn_TRADE:中央制御要素である[Trade]ボタンを表します。このボタンを押すと、取引機能がアクティブになり、取引オプションに移動し、取引アクションに固有のサブメニューが開きます。
- obj_Btn_CLOSE:ここでの「閉じる」ボタンは、取引の終了を管理するために使用される特殊なボタンです。これは、パネル上の取引セクションとクローズセクション間を切り替えるスイッチとして機能します。
- obj_Btn_INFO:このボタンは、取引指標、口座の詳細、パネルの説明などの情報コンテンツをユーザーに表示するために使用されます。
取引機能ボタンの場合、オブジェクトは取引コンテキスト内で特定の目的を果たします。
- obj_Btn_RISK:リスク管理ボタンとして機能します。これにより、ユーザーは取引ごとのリスクの割合などのリスクパラメータを設定または調整できるようになります。
- obj_Btn_POINTS:このボタンは、ストップロスやテイクプロフィットなどの特定のレベルが価格レベルではなくポイントで定義されるポイントベースの取引オプションを設定または切り替えるために使用されます。
- obj_Btn_SELL、obj_Btn_ENTRY、obj_Btn_BUY:直接取引アクションボタンを表します。obj_Btn_SELLは売り取引をトリガーし、obj_Btn_BUYは買い取引を開始し、obj_Btn_ENTRYは市場エントリのプレースホルダーとして機能します。
予約注文の場合、これらのボタンはアクションを定義します。
- obj_Btn_SELLSTOPおよびobj_Btn_BUYSTOP:それぞれ現在の価格より下または上に配置された売りストップおよび買いストップ予約注文の配置を制御します。
- obj_Btn_SELLLIMITおよびobj_Btn_BUYLIMIT:売り指値および買い指値の予約注文を処理し、ユーザーが価格の戻りを予想して指定されたレベルで注文を出すことを可能にします。
最後に、パネルのフッターボタンを定義するために使用するobj_Btn_FOOTERがあります。このボタンは装飾要素、リセットコントロール、または概要ビューに切り替えるナビゲーションボタンとして機能することができますが、この場合はダッシュボードの概要を表示するためにのみ使用します。
同様に、編集フィールドとラベルフィールドをそれぞれ定義する必要があります。次のロジックが適用されます。
#include <Controls/Edit.mqh>                                   //--- Include edit control library
CEdit obj_Edit_RISK;                                        //--- Risk edit field object
CEdit obj_Edit_PRICE;                                       //--- Price edit field object
CEdit obj_Edit_LOTS;                                        //--- Lots edit field object
CEdit obj_Edit_SL;                                          //--- Stop Loss edit field object
CEdit obj_Edit_TP;                                          //--- Take Profit edit field object

#include <Controls/Label.mqh>                                  //--- Include label control library
CLabel obj_Lbl_HEADER;                                      //--- Header label object
CLabel obj_Lbl_PRICE;                                       //--- Price label object
CLabel obj_Lbl_LOTS;                                        //--- Lots label object
CLabel obj_Lbl_SL;                                          //--- Stop Loss label object
CLabel obj_Lbl_TP;                                          //--- Take Profit label object
ここでは、ユーザー入力を制御し、ダッシュボードパネルにテキストを表示するための重要なコントロールライブラリを組み込みます。まず、編集可能な入力フィールドに機能を提供する「Edit.mqh」ライブラリを組み込みます。リスク編集フィールドとしてobj_Edit_RISKを含む、CEditクラスのいくつかのオブジェクトが定義されています。オブジェクトobj_Edit_PRICEは価格編集フィールドを表し、ユーザーはここで取引を実行する価格を指定できます。obj_Edit_LOTSというオブジェクトはロットサイズ用に指定されており、ユーザーはこれを調整して取引したいロット数を示すことができます。obj_Edit_SLはストップロス編集フィールドです。最後に、obj_Edit_TPは、Take Profit編集フィールドとして機能します。
次に、「Label.mqh」ライブラリを統合します。このライブラリは、パネル上に静的なテキストラベルを作成するプロセスを簡素化します。これは、ユーザーフレンドリなインターフェイスを提供するのに特に役立ちます。このライブラリは、私たちの作業環境向けに特別に設計されており、パネルに必要なさまざまなラベルを作成するために何度かインスタンス化したCLabelというクラスが含まれています。最初にインスタンス化するラベルはobj_Lbl_HEADERと呼ばれ、パネルの一番上にタイトルまたは最も重要な情報を表示するために使用されます。次のラベルはobj_Lbl_PRICEと呼ばれ、作業中の資産の現在の価格を示すために使用されます。ロットサイズ入力フィールドの横には、ロットサイズを示すために使用されるobj_Lbl_LOTSというラベルがあります。これに続いて、それぞれのパネルフィールドを以下のように定義できます。
//--- Define button names for easier reference
#define Btn_MAIN "Btn_MAIN"                                   //--- Button name for the main button
#define Btn_HEADER "Btn_HEADER"                               //--- Button name for the header button
#define Btn_X "Btn_X"                                        //--- Button name for the close button
#define Btn_TRADE "Btn_TRADE"                               //--- Button name for the trade button
#define Btn_CLOSE "Btn_CLOSE"                                //--- Button name for the close button
#define Btn_INFO "Btn_INFO"                                  //--- Button name for the info button

#define Btn_RISK "Btn_RISK"                                  //--- Button name for the risk button
#define Btn_POINTS "Btn_POINTS"                              //--- Button name for the points button
#define Btn_SELL "Btn_SELL"                                  //--- Button name for the sell button
#define Btn_ENTRY "Btn_ENTRY"                                //--- Button name for the entry button
#define Btn_BUY "Btn_BUY"                                    //--- Button name for the buy button
#define Btn_SELLSTOP "Btn_SELLSTOP"                          //--- Button name for the sell stop button
#define Btn_BUYSTOP "Btn_BUYSTOP"                            //--- Button name for the buy stop button
#define Btn_SELLLIMIT "Btn_SELLLIMIT"                        //--- Button name for the sell limit button
#define Btn_BUYLIMIT "Btn_BUYLIMIT"                          //--- Button name for the buy limit button
#define Btn_FOOTER "Btn_FOOTER"                              //--- Button name for the footer button

//---
//--- Define edit field names for easier reference
#define Edit_RISK "Edit_RISK"                                //--- Edit field name for risk input
#define Edit_PRICE "Edit_PRICE"                              //--- Edit field name for price input
#define Edit_LOTS "Edit_LOTS"                                //--- Edit field name for lots input
#define Edit_SL "Edit_SL"                                    //--- Edit field name for stop loss input
#define Edit_TP "Edit_TP"                                    //--- Edit field name for take profit input

//--- Define label names for easier reference
#define Lbl_HEADER "Lbl_HEADER"                              //--- Label name for the header
#define Lbl_PRICE "Lbl_PRICE"                                //--- Label name for the price
#define Lbl_LOTS "Lbl_LOTS"                                  //--- Label name for the lots
#define Lbl_SL "Lbl_SL"                                      //--- Label name for the stop loss
#define Lbl_TP "Lbl_TP"                                      //--- Label name for the take profit
初期化インターフェイスに必要な主要な要素を定義した後、すでに定義されているユーティリティを使用して、パネルにヘッダを追加することができます。採用されたヘッダロジックは、以下のコードスニペットに示されています。
   //--- HEADER BUTTON
   obj_Btn_HEADER.Create(0, Btn_HEADER, 0, 30, 30, 0, 0); //--- Create the header button at specified coordinates
   obj_Btn_HEADER.Size(310, 25); //--- Set size of the header button
   obj_Btn_HEADER.ColorBackground(clrLightBlue); //--- Set background color of the header button
   obj_Btn_HEADER.ColorBorder(clrBlack); //--- Set border color of the header button
ここでは、ダッシュボードパネルのヘッダボタンを作成してカスタマイズします。まず、obj_Btn_HEADERオブジェクトのCreateメソッドを使用して、チャートID、名前(Btn_HEADER)、最初の座標(30, 30)、および2番目の座標(0, 0)を指定するパラメータを使用してボタンを初期化します。次に、Sizeメソッドを使用してボタンのサイズを幅310ピクセル、高さ25ピクセルに設定し、パネルレイアウト内に適切に収まるようにします。
次に、ColorBackgroundメソッドを使用してヘッダボタンの背景色をカスタマイズし、見た目を良くするためにclrLightBlueに設定します。さらに、ColorBorderメソッドを使用して境界線の色を指定し、clrBlackに設定します。これにより、パネルの背景に対するボタンの可視性と鮮明度が向上します。コンパイルすると、次の出力が得られます。

うまくいきました。ヘッダにラベルとサイドの「閉じる」ボタンを追加することで、ヘッダをさらに活気のあるものにすることができます。まず「閉じる」ボタンを追加しましょう。そのロジックは以下のとおりです。
   //--- X BUTTON
   obj_Btn_X.Create(0, Btn_X, 0, 30 + 280, 30 + 1, 0, 0); //--- Create the close button (X) at specified coordinates
   obj_Btn_X.Size(30 - 1, 25 - 1 - 1); //--- Set size of the close button
   obj_Btn_X.ColorBackground(clrLightBlue); //--- Set background color of the close button
   obj_Btn_X.ColorBorder(clrLightBlue); //--- Set border color of the close button
   obj_Btn_X.Text(CharToString(255)); //--- Set the close button text to an "X" character
   obj_Btn_X.Color(clrBlack); //--- Set text color of the close button
   obj_Btn_X.Font("Wingdings"); //--- Set font of the close button to Wingdings
   obj_Btn_X.FontSize(17); //--- Set font size of the close button
ここでは、ダッシュボードパネルの「閉じる」ボタン(X)を作成して構成します。まず、obj_Btn_XオブジェクトのCreateメソッドを使用してボタンを初期化します。私たちが提供するパラメータは、チャートのID、名前(Btn_X)、チャート上の位置を指定します。これらは、パネルレイアウト内で適切に配置されるように、x座標では(30 + 280)、y座標では(30 + 1)に配置されるように計算されます。
次に、Sizeメソッドを使用して、「閉じる」ボタンのサイズを幅29 (30 -1)ピクセル、高さ23 (25 - 1 - 1) ピクセルに設定し、UIにうまく収まるようにデフォルトサイズをわずかに縮小します。境界線を処理するために1ピクセルを調整します。これにより、ヘッダの境界線が上書きされず、ヘッダの内側に収まるようになります。次に、ColorBackgroundメソッドを使用してボタンの背景色を水色にカスタマイズし、ヘッダボタンとの一貫した外観を作成して、ヘッダ内に完全に溶け込ませます。また、ColorBorderメソッドを使用して境界線の色を水色に設定することで、ボタンにコントラストの強い境界線のないすっきりとした外観を与えます。
次に、CharToString関数とそのパラメータ255を使用して、ボタンのテキストをアイコン文字に設定します。これにより、ボタンが「閉じる」ボタンとしての機能を視覚的に示すことができます。MQL5では、文字はWindowsアイコンを表しますが、他のものでもかまいません。Colorメソッドを使用してテキストの色を黒に設定し、明るい背景に対して目立つようにします。最後に、Fontメソッドを使用して、「閉じる」ボタンのフォントとして、Windows銘柄を表示するのに適したWingdingsを選択し、FontSizeメソッドを使用してフォントサイズを17に設定して読みやすさを向上させました。以下はMQL5で可能な銘柄コードの表現です。
![]()
選択できるオプションが多数あることがわかりますが、ここでは最初の255コードに固執します。ヘッダのタイトルを設定するだけで、ヘッダセクションは完了です。
   //--- HEADER LABEL
   obj_Lbl_HEADER.Create(0, Lbl_HEADER, 0, 40, 30, 0, 0); //--- Create the header label at specified coordinates
   obj_Lbl_HEADER.Text("Control Panel"); //--- Set text of the header label
   obj_Lbl_HEADER.Color(clrRed); //--- Set text color of the header label
   obj_Lbl_HEADER.Font("Cooper black"); //--- Set font of the header label to Cooper Black
   obj_Lbl_HEADER.FontSize(14); //--- Set font size of the header label
ここでは、取引ダッシュボードのヘッダラベルを作成して構成します。まず、obj_Lbl_HEADERオブジェクトのCreateメソッドを使用してラベルを初期化し、チャートID、ラベル名(Lbl_HEADER)、チャート上の位置(x座標の場合は(40)、y座標の場合は(30))を指定します。この配置により、ヘッダラベルがパネルレイアウト内に適切に表示されます。
次に、Textメソッドを使用してヘッダラベルのテキストを「Control Panel」に設定し、ダッシュボードの目的を明確に示します。もちろん、これは自分で選択した他のものでもかまいません。お気軽に変更してください。次に、Colorメソッドを使用してテキストの色を赤にカスタマイズし、背景に対して目立つようにして視認性を向上させます。ヘッダラベルのフォントは、Fontメソッドを使用して「Cooper black」に設定されており、テキストに独特でプロフェッショナルな外観を与えます。最後に、FontSizeメソッドを使用してフォントサイズを14に指定し、ヘッダテキストが読みやすくなるようにします。コンパイルすると、次のような出力が得られます。

うまくいきました。同様の形式で、ナビゲーションボタンの作成に進むことができます。まず、次のロジックを使用して取引操作ビューボタンを作成します。
   //--- TRADE BUTTON
   obj_Btn_TRADE.Create(0, Btn_TRADE, 0, 40, 60, 0, 0); //--- Create the trade button at specified coordinates
   obj_Btn_TRADE.Size(90, 30); //--- Set size of the trade button
   obj_Btn_TRADE.ColorBackground(clrYellow); //--- Set background color of the trade button
   obj_Btn_TRADE.ColorBorder(clrYellow); //--- Set border color of the trade button
   obj_Btn_TRADE.Text("Trade"); //--- Set text of the trade button
   obj_Btn_TRADE.Color(clrBlack); //--- Set text color of the trade button
   obj_Btn_TRADE.Font("Arial Black"); //--- Set font of the trade button to Arial Black
   obj_Btn_TRADE.FontSize(13); //--- Set font size of the trade button
ここでは、ボタンのサイズを変更し、背景色を黄色に変更します。コンパイルすると、次の出力が得られます。

うまくいきました。ボタンがアクティブであることを示すために、ボタンの色を黄色に設定します。したがって、他のナビゲーションボタンを定義するときにも同様のロジックが維持されますが、色が非アクティブなものに変更されます。完全なロジックは次のとおりです。
   //--- CLOSE BUTTON
   obj_Btn_CLOSE.Create(0, Btn_CLOSE, 0, 40 + obj_Btn_TRADE.Width() + 10, 60, 0, 0); //--- Create the close button at specified coordinates
   obj_Btn_CLOSE.Size(90, 30); //--- Set size of the close button
   obj_Btn_CLOSE.ColorBackground(clrSilver); //--- Set background color of the close button
   obj_Btn_CLOSE.ColorBorder(clrSilver); //--- Set border color of the close button
   obj_Btn_CLOSE.Text("Close"); //--- Set text of the close button
   obj_Btn_CLOSE.Color(clrBlack); //--- Set text color of the close button
   obj_Btn_CLOSE.Font("Arial Black"); //--- Set font of the close button to Arial Black
   obj_Btn_CLOSE.FontSize(13); //--- Set font size of the close button

   //--- INFO BUTTON
   obj_Btn_INFO.Create(0, Btn_INFO, 0, 40 + obj_Btn_TRADE.Width() + 10 + obj_Btn_CLOSE.Width() + 10, 60, 0, 0); //--- Create the info button at specified coordinates
   obj_Btn_INFO.Size(90, 30); //--- Set size of the info button
   obj_Btn_INFO.ColorBackground(clrSilver); //--- Set background color of the info button
   obj_Btn_INFO.ColorBorder(clrSilver); //--- Set border color of the info button
   obj_Btn_INFO.Text("Inform'n"); //--- Set text of the info button
   obj_Btn_INFO.Color(clrBlack); //--- Set text color of the info button
   obj_Btn_INFO.Font("Arial Black"); //--- Set font of the info button to Arial Black
   obj_Btn_INFO.FontSize(13); //--- Set font size of the info button
ここでは、「閉じる」ボタンと情報ボタンを作成し、初期の非アクティブ状態を示すために背景色を銀色に設定します。結果は次のとおりです。

ナビゲーションボタンを定義した後、初期化取引本体を確定させる前にフッターセクションを定義できます。そのロジックは、以下のコードスニペットに示すとおりです。
   //--- FOOTER BUTTON
   obj_Btn_FOOTER.Create(0, Btn_FOOTER, 0, 30 + 1, 305 - 1, 0, 0); //--- Create the footer button at specified coordinates
   obj_Btn_FOOTER.Size(310 - 1 - 1, 25); //--- Set size of the footer button
   obj_Btn_FOOTER.ColorBackground(C'070,070,070'); //--- Set background color of the footer button
   obj_Btn_FOOTER.ColorBorder(C'070,070,070'); //--- Set border color of the footer button
   obj_Btn_FOOTER.Text(ShortToString(0x23F0) + "https://t.me/Forex_Algo_Trader"); //--- Set text of the footer button with a link
   obj_Btn_FOOTER.Color(clrWhite); //--- Set text color of the footer button
   obj_Btn_FOOTER.Font("Calibri bold italic"); //--- Set font of the footer button to Calibri bold italic
   obj_Btn_FOOTER.FontSize(12); //--- Set font size of the footer button
ここでは、通常のパラメータを渡してパネルの下部に配置することで、取引ダッシュボードのフッターボタンを作成して構成します。次に、Sizeメソッドを使用してフッターボタンのサイズを定義し、幅を310 - 1 - 1、高さを25に設定します。これにより、ボタンがパネルのフッター領域内に適切に収まるようになります。次に、ColorBackgroundメソッドを使用してRGB値「C'070,070,070'」でボタンの背景色をダークグレーにカスタマイズし、視覚的に魅力的で全体的なデザインと一貫性のある色にして、基本的にメインボタンに溶け込ませます。
境界線の色もColorBorderメソッドを使用して同じダークグレーに設定され、ボタンにシームレスな外観を与えます。ボタンのテキストについては、Textメソッドを使用して、アイコン(時計として表示されるUnicode文字0x23F0で表される)とリンク「https://t.me/Forex_Algo_Trader」の組み合わせに設定し、ユーザーが追加のリソースにアクセスするように促します。Unicode文字を、ShortToString関数を使用してアイコンに変換しました。文字は以下に示すように16進形式であるため、この関数が必要になります。

暗い背景に対して視認性を高めるために、Colorメソッドを使用してテキストの色を白に設定します。最後に、Fontメソッドを使用してフッターボタンのフォントを「Calibri太字斜体」に設定してプロフェッショナルな雰囲気を加え、FontSizeメソッドを使用してフォントサイズを12に設定して、テキストが読みやすいようにします。コンパイルすると、次のマイルストーンが得られます。

うまくいきました。次に、本体セクションを最終決定する必要があります。これですべて問題ありません。ナビゲーションボタンがアクティブになるたびに本体のビューを常に変更する必要があるため、関数内に本体のロジックを用意し、必要な場合にのみ呼び出すことができます。
   // BODY OF THE PANEL
   createSection_Trade(); //--- Call function to create the trade section
ここでは、ダッシュボードの[Trade]セクションを設定するために、パネルの本体内にcreateSection_Tradeという関数を作成します。これは通常、定義した関数を呼び出すことです。この機能は、購入、販売、注文タイプのボタンなど、取引操作に関連するインタラクティブな要素を作成および構成するために使用されます。この関数を使用することで、コードがモジュール化され整理され、取引に関連するすべての要素を個別の関数内で処理できるようになります。これにより、メインパネルのセットアップがよりクリーンに保たれ、必要に応じてダッシュボードシステムを保守および拡張しやすくなります。
次に関数を定義する必要があります。これは単純な関数なので、void関数として定義し、パラメータを渡しません。
void createSection_Trade(){

//---

}
関数の機能を作成するには、コード全体でおこなってきたのと同じ作成ロジックを使用します。完全な関数コードスニペットは次のようになります。
//+------------------------------------------------------------------+
//|     FUNCTION TO CREATE THE TRADE SECTION                         |
//+------------------------------------------------------------------+
void createSection_Trade(){
   //--- RISK BUTTON
   obj_Btn_RISK.Create(0,Btn_RISK,0,40,100,0,0); //--- Create the risk button
   obj_Btn_RISK.Size(210,25); //--- Set the button size
   obj_Btn_RISK.ColorBackground(clrTurquoise); //--- Set the background color
   obj_Btn_RISK.ColorBorder(clrTurquoise); //--- Set the border color
   obj_Btn_RISK.Text("Risk based on Equity (%)"); //--- Set the button text
   obj_Btn_RISK.Color(clrBlack); //--- Set the text color
   obj_Btn_RISK.Font("Arial Black"); //--- Set the font style
   obj_Btn_RISK.FontSize(11); //--- Set the font size

   //--- RISK EDIT
   obj_Edit_RISK.Create(0,Edit_RISK,0,40+220,100,0,0); //--- Create the risk edit field
   obj_Edit_RISK.Size(70,25); //--- Set the edit field size
   obj_Edit_RISK.ColorBackground(clrWhite); //--- Set the background color
   obj_Edit_RISK.ColorBorder(clrBlack); //--- Set the border color
   obj_Edit_RISK.Text("78"); //--- Set the default text
   obj_Edit_RISK.Color(clrBlack); //--- Set the text color
   obj_Edit_RISK.Font("Times new roman bold"); //--- Set the font style
   obj_Edit_RISK.FontSize(15); //--- Set the font size

   //--- PRICE LABEL
   obj_Lbl_PRICE.Create(0,Lbl_PRICE,0,40,130,0,0); //--- Create the price label
   obj_Lbl_PRICE.Text("Price"); //--- Set the label text
   obj_Lbl_PRICE.Color(clrWhite); //--- Set the text color
   obj_Lbl_PRICE.Font("Arial black"); //--- Set the font style
   obj_Lbl_PRICE.FontSize(13); //--- Set the font size

   //--- PRICE EDIT
   obj_Edit_PRICE.Create(0,Edit_PRICE,0,40+60,130,0,0); //--- Create the price edit field
   obj_Edit_PRICE.Size(90,25); //--- Set the edit field size
   obj_Edit_PRICE.ColorBackground(clrWhite); //--- Set the background color
   obj_Edit_PRICE.ColorBorder(clrBlack); //--- Set the border color
   obj_Edit_PRICE.Text(DoubleToString(SymbolInfoDouble(_Symbol,SYMBOL_ASK),_Digits)); //--- Set the default text to current ask price
   obj_Edit_PRICE.Color(clrBlack); //--- Set the text color
   obj_Edit_PRICE.Font("Times new roman bold"); //--- Set the font style
   obj_Edit_PRICE.FontSize(13); //--- Set the font size

   //--- LOTS LABEL
   obj_Lbl_LOTS.Create(0,Lbl_LOTS,0,40+160,130,0,0); //--- Create the lot size label
   obj_Lbl_LOTS.Text("Lot size"); //--- Set the label text
   obj_Lbl_LOTS.Color(clrWhite); //--- Set the text color
   obj_Lbl_LOTS.Font("Arial black"); //--- Set the font style
   obj_Lbl_LOTS.FontSize(13); //--- Set the font size

   //--- LOTS EDIT
   obj_Edit_LOTS.Create(0,Edit_LOTS,0,40+60+180,130,0,0); //--- Create the lot size edit field
   obj_Edit_LOTS.Size(50,25); //--- Set the edit field size
   obj_Edit_LOTS.ColorBackground(clrWhite); //--- Set the background color
   obj_Edit_LOTS.ColorBorder(clrBlack); //--- Set the border color
   obj_Edit_LOTS.Text("0.01"); //--- Set the default text
   obj_Edit_LOTS.Color(clrBlack); //--- Set the text color
   obj_Edit_LOTS.Font("Times new roman bold"); //--- Set the font style
   obj_Edit_LOTS.FontSize(13); //--- Set the font size

   //--- SL LABEL
   obj_Lbl_SL.Create(0,Lbl_SL,0,40,160,0,0); //--- Create the stop loss label
   obj_Lbl_SL.Text("SL"); //--- Set the label text
   obj_Lbl_SL.Color(clrWhite); //--- Set the text color
   obj_Lbl_SL.Font("Arial black"); //--- Set the font style
   obj_Lbl_SL.FontSize(13); //--- Set the font size

   //--- SL EDIT
   obj_Edit_SL.Create(0,Edit_SL,0,40+30,160,0,0); //--- Create the stop loss edit field
   obj_Edit_SL.Size(70,25); //--- Set the edit field size
   obj_Edit_SL.ColorBackground(clrWhite); //--- Set the background color
   obj_Edit_SL.ColorBorder(clrBlack); //--- Set the border color
   obj_Edit_SL.Text("300"); //--- Set the default text
   obj_Edit_SL.Color(clrBlack); //--- Set the text color
   obj_Edit_SL.Font("Times new roman bold"); //--- Set the font style
   obj_Edit_SL.FontSize(13); //--- Set the font size

   //--- TP LABEL
   obj_Lbl_TP.Create(0,Lbl_TP,0,40+190,160,0,0); //--- Create the take profit label
   obj_Lbl_TP.Text("TP"); //--- Set the label text
   obj_Lbl_TP.Color(clrWhite); //--- Set the text color
   obj_Lbl_TP.Font("Arial black"); //--- Set the font style
   obj_Lbl_TP.FontSize(13); //--- Set the font size

   //--- TP EDIT
   obj_Edit_TP.Create(0,Edit_TP,0,40+30+190,160,0,0); //--- Create the take profit edit field
   obj_Edit_TP.Size(70,25); //--- Set the edit field size
   obj_Edit_TP.ColorBackground(clrWhite); //--- Set the background color
   obj_Edit_TP.ColorBorder(clrBlack); //--- Set the border color
   obj_Edit_TP.Text("750"); //--- Set the default text
   obj_Edit_TP.Color(clrBlack); //--- Set the text color
   obj_Edit_TP.Font("Times new roman bold"); //--- Set the font style
   obj_Edit_TP.FontSize(13); //--- Set the font size

   //--- POINTS BUTTON
   obj_Btn_POINTS.Create(0,Btn_POINTS,0,40+110,160,0,0); //--- Create the points button
   obj_Btn_POINTS.Size(70,25); //--- Set the button size
   obj_Btn_POINTS.ColorBackground(clrGoldenrod); //--- Set the background color
   obj_Btn_POINTS.ColorBorder(clrGoldenrod); //--- Set the border color
   obj_Btn_POINTS.Text("Points"); //--- Set the button text
   obj_Btn_POINTS.Color(clrBlack); //--- Set the text color
   obj_Btn_POINTS.Font("Calibri bold"); //--- Set the font style
   obj_Btn_POINTS.FontSize(14); //--- Set the font size

   //--- SELL BUTTON
   obj_Btn_SELL.Create(0,Btn_SELL,0,40,210,0,0); //--- Create the sell button
   obj_Btn_SELL.Size(100,25); //--- Set the button size
   obj_Btn_SELL.ColorBackground(clrOrangeRed); //--- Set the background color
   obj_Btn_SELL.ColorBorder(clrOrangeRed); //--- Set the border color
   obj_Btn_SELL.Text("Sell"); //--- Set the button text
   obj_Btn_SELL.Color(clrWhite); //--- Set the text color
   obj_Btn_SELL.Font("Calibri bold"); //--- Set the font style
   obj_Btn_SELL.FontSize(14); //--- Set the font size

   //--- ENTRY BUTTON
   obj_Btn_ENTRY.Create(0,Btn_ENTRY,0,150,210,0,0); //--- Create the entry button
   obj_Btn_ENTRY.Size(70,25); //--- Set the button size
   obj_Btn_ENTRY.ColorBackground(clrGoldenrod); //--- Set the background color
   obj_Btn_ENTRY.ColorBorder(clrGoldenrod); //--- Set the border color
   obj_Btn_ENTRY.Text("Entry"); //--- Set the button text
   obj_Btn_ENTRY.Color(clrBlack); //--- Set the text color
   obj_Btn_ENTRY.Font("Calibri bold"); //--- Set the font style
   obj_Btn_ENTRY.FontSize(14); //--- Set the font size

   //--- BUY BUTTON
   obj_Btn_BUY.Create(0,Btn_BUY,0,40+190,210,0,0); //--- Create the buy button
   obj_Btn_BUY.Size(100,25); //--- Set the button size
   obj_Btn_BUY.ColorBackground(clrLimeGreen); //--- Set the background color
   obj_Btn_BUY.ColorBorder(clrLimeGreen); //--- Set the border color
   obj_Btn_BUY.Text("Buy"); //--- Set the button text
   obj_Btn_BUY.Color(clrWhite); //--- Set the text color
   obj_Btn_BUY.Font("Calibri bold"); //--- Set the font style
   obj_Btn_BUY.FontSize(14); //--- Set the font size

   //--- SELL STOP BUTTON
   obj_Btn_SELLSTOP.Create(0,Btn_SELLSTOP,0,40,240,0,0); //--- Create the sell stop button
   obj_Btn_SELLSTOP.Size(140,25); //--- Set the button size
   obj_Btn_SELLSTOP.ColorBackground(clrOrangeRed); //--- Set the background color
   obj_Btn_SELLSTOP.ColorBorder(clrOrangeRed); //--- Set the border color
   obj_Btn_SELLSTOP.Text("Sell Stop"); //--- Set the button text
   obj_Btn_SELLSTOP.Color(clrWhite); //--- Set the text color
   obj_Btn_SELLSTOP.Font("Calibri bold"); //--- Set the font style
   obj_Btn_SELLSTOP.FontSize(14); //--- Set the font size

   //--- BUY STOP BUTTON
   obj_Btn_BUYSTOP.Create(0,Btn_BUYSTOP,0,40+190-40,240,0,0); //--- Create the buy stop button
   obj_Btn_BUYSTOP.Size(140,25); //--- Set the button size
   obj_Btn_BUYSTOP.ColorBackground(clrLimeGreen); //--- Set the background color
   obj_Btn_BUYSTOP.ColorBorder(clrLimeGreen); //--- Set the border color
   obj_Btn_BUYSTOP.Text("Buy Stop"); //--- Set the button text
   obj_Btn_BUYSTOP.Color(clrWhite); //--- Set the text color
   obj_Btn_BUYSTOP.Font("Calibri bold"); //--- Set the font style
   obj_Btn_BUYSTOP.FontSize(14); //--- Set the font size

   //--- SELL LIMIT BUTTON
   obj_Btn_SELLLIMIT.Create(0,Btn_SELLLIMIT,0,40,270,0,0); //--- Create the sell limit button
   obj_Btn_SELLLIMIT.Size(140,25); //--- Set the button size
   obj_Btn_SELLLIMIT.ColorBackground(clrOrangeRed); //--- Set the background color
   obj_Btn_SELLLIMIT.ColorBorder(clrOrangeRed); //--- Set the border color
   obj_Btn_SELLLIMIT.Text("Sell Limit"); //--- Set the button text
   obj_Btn_SELLLIMIT.Color(clrWhite); //--- Set the text color
   obj_Btn_SELLLIMIT.Font("Calibri bold"); //--- Set the font style
   obj_Btn_SELLLIMIT.FontSize(14); //--- Set the font size

   //--- BUY LIMIT BUTTON
   obj_Btn_BUYLIMIT.Create(0,Btn_BUYLIMIT,0,40+190-40,270,0,0); //--- Create the buy limit button
   obj_Btn_BUYLIMIT.Size(140,25); //--- Set the button size
   obj_Btn_BUYLIMIT.ColorBackground(clrLimeGreen); //--- Set the background color
   obj_Btn_BUYLIMIT.ColorBorder(clrLimeGreen); //--- Set the border color
   obj_Btn_BUYLIMIT.Text("Buy Limit"); //--- Set the button text
   obj_Btn_BUYLIMIT.Color(clrWhite); //--- Set the text color
   obj_Btn_BUYLIMIT.Font("Calibri bold"); //--- Set the font style
   obj_Btn_BUYLIMIT.FontSize(14); //--- Set the font size
}
コンパイルすると、次の出力が得られます。

うまくいきました。これで、必要なアプリ取引インターフェイスが完成しました。他のナビゲーションセクションビューの作成に進むだけで、作業は完了です。まず、終了インターフェイスを作成し、そのロジックも関数内に整理します。ただし、関数ユーティリティを定義する前に、オブジェクト宣言とともにボタンのそれぞれの名前を定義する必要があります。ここにオブジェクト宣言ロジックがあります。
CButton obj_Btn_CLOSE_ALL;                                  //--- Close All button object
CButton obj_Btn_CLOSE_ALL_SELL;                             //--- Close All Sell button object
CButton obj_Btn_CLOSE_ALL_BUY;                              //--- Close All Buy button object
CButton obj_Btn_CLOSE_LOSS_SELL;                            //--- Close Loss Sell button object
CButton obj_Btn_CLOSE_LOSS_BUY;                             //--- Close Loss Buy button object
CButton obj_Btn_CLOSE_PROFIT_SELL;                          //--- Close Profit Sell button object
CButton obj_Btn_CLOSE_PROFIT_BUY;                           //--- Close Profit Buy button object
CButton obj_Btn_CLOSE_ALL_LOSS;                             //--- Close All Loss button object
CButton obj_Btn_CLOSE_ALL_PROFIT;                           //--- Close All Profit button object
CButton obj_Btn_CLOSE_PENDING;                              //--- Close Pending button object

//---

CButton obj_Btn_ACC_NUMBER;                                 //--- Account Number button object
CButton obj_Btn_ACC_NAME;                                   //--- Account Name button object
CButton obj_Btn_ACC_TYPE;                                   //--- Account Type button object
CButton obj_Btn_ACC_LEVERAGE;                               //--- Account Leverage button object

CButton obj_Btn_ACC_EQUITY;                                 //--- Account Equity button object
CButton obj_Btn_ACC_BALANCE;                                //--- Account Balance button object
CButton obj_Btn_TIME;                                       //--- Time button object


//---
CLabel obj_Lbl_ACC_NUMBER;                                  //--- Account Number label object
CLabel obj_Lbl_ACC_NAME;                                    //--- Account Name label object
CLabel obj_Lbl_ACC_TYPE;                                    //--- Account Type label object
CLabel obj_Lbl_ACC_LEVERAGE;                                //--- Account Leverage label object

CLabel obj_Lbl_ACC_EQUITY;                                  //--- Account Equity label object
CLabel obj_Lbl_ACC_BALANCE;                                 //--- Account Balance label object
CLabel obj_Lbl_TIME;                                        //--- Time label object
オブジェクト定義ロジックは次のとおりです。
#define Btn_CLOSE_ALL "Btn_CLOSE_ALL"                        //--- Button name for closing all trades
#define Btn_CLOSE_ALL_SELL "Btn_CLOSE_ALL_SELL"              //--- Button name for closing all sell trades
#define Btn_CLOSE_ALL_BUY "Btn_CLOSE_ALL_BUY"                //--- Button name for closing all buy trades
#define Btn_CLOSE_LOSS_SELL "Btn_CLOSE_LOSS_SELL"            //--- Button name for closing all loss sell trades
#define Btn_CLOSE_LOSS_BUY "Btn_CLOSE_LOSS_BUY"              //--- Button name for closing all loss buy trades
#define Btn_CLOSE_PROFIT_SELL "Btn_CLOSE_PROFIT_SELL"        //--- Button name for closing all profit sell trades
#define Btn_CLOSE_PROFIT_BUY "Btn_CLOSE_PROFIT_BUY"          //--- Button name for closing all profit buy trades
#define Btn_CLOSE_ALL_LOSS "Btn_CLOSE_ALL_LOSS"              //--- Button name for closing all loss trades
#define Btn_CLOSE_ALL_PROFIT "Btn_CLOSE_ALL_PROFIT"          //--- Button name for closing all profit trades
#define Btn_CLOSE_PENDING "Btn_CLOSE_PENDING"                //--- Button name for closing all pending trades

#define Btn_ACC_NUMBER "Btn_ACC_NUMBER"                      //--- Button name for the account number
#define Btn_ACC_NAME "Btn_ACC_NAME"                          //--- Button name for the account name
#define Btn_ACC_TYPE "Btn_ACC_TYPE"                          //--- Button name for the account type
#define Btn_ACC_LEVERAGE "Btn_ACC_LEVERAGE"                  //--- Button name for the account leverage

#define Btn_ACC_EQUITY "Btn_ACC_EQUITY"                      //--- Button name for the account equity
#define Btn_ACC_BALANCE "Btn_ACC_BALANCE"                    //--- Button name for the account balance
#define Btn_TIME "Btn_TIME"                                  //--- Button name for the time

//---
#define Lbl_ACC_NUMBER "Lbl_ACC_NUMBER"                      //--- Label name for the account number
#define Lbl_ACC_NAME "Lbl_ACC_NAME"                          //--- Label name for the account name
#define Lbl_ACC_TYPE "Lbl_ACC_TYPE"                          //--- Label name for the account type
#define Lbl_ACC_LEVERAGE "Lbl_ACC_LEVERAGE"                  //--- Label name for the account leverage

#define Lbl_ACC_EQUITY "Lbl_ACC_EQUITY"                      //--- Label name for the account equity
#define Lbl_ACC_BALANCE "Lbl_ACC_BALANCE"                    //--- Label name for the account balance
#define Lbl_TIME "Lbl_TIME"                                  //--- Label name for the time
必要なパラメータをすべて定義したら、次のようにclose関数を作成します。
//+------------------------------------------------------------------+
//|      FUNCTION TO CREATE THE CLOSE SECTION                        |
//+------------------------------------------------------------------+
void createSection_Close(){
   //--- CLOSE ALL BUTTON
   obj_Btn_CLOSE_ALL.Create(0, Btn_CLOSE_ALL, 0, 80, 120, 0, 0); //--- Create the close all button
   obj_Btn_CLOSE_ALL.Size(210, 25); //--- Set the button size
   obj_Btn_CLOSE_ALL.ColorBackground(clrPeru); //--- Set the background color
   obj_Btn_CLOSE_ALL.ColorBorder(clrWhite); //--- Set the border color
   obj_Btn_CLOSE_ALL.Text("Close All"); //--- Set the button text
   obj_Btn_CLOSE_ALL.Color(clrBlack); //--- Set the text color
   obj_Btn_CLOSE_ALL.Font("Calibri bold"); //--- Set the font style
   obj_Btn_CLOSE_ALL.FontSize(14); //--- Set the font size

   //--- CLOSE ALL SELL BUTTON
   obj_Btn_CLOSE_ALL_SELL.Create(0, Btn_CLOSE_ALL_SELL, 0, 40, 150, 0, 0); //--- Create the close all sell button
   obj_Btn_CLOSE_ALL_SELL.Size(140, 25); //--- Set the button size
   obj_Btn_CLOSE_ALL_SELL.ColorBackground(clrSalmon); //--- Set the background color
   obj_Btn_CLOSE_ALL_SELL.ColorBorder(clrWhite); //--- Set the border color
   obj_Btn_CLOSE_ALL_SELL.Text("Close All Sell"); //--- Set the button text
   obj_Btn_CLOSE_ALL_SELL.Color(clrBlack); //--- Set the text color
   obj_Btn_CLOSE_ALL_SELL.Font("Calibri bold"); //--- Set the font style
   obj_Btn_CLOSE_ALL_SELL.FontSize(14); //--- Set the font size

   //--- CLOSE ALL BUY BUTTON
   obj_Btn_CLOSE_ALL_BUY.Create(0, Btn_CLOSE_ALL_BUY, 0, 190, 150, 0, 0); //--- Create the close all buy button
   obj_Btn_CLOSE_ALL_BUY.Size(140, 25); //--- Set the button size
   obj_Btn_CLOSE_ALL_BUY.ColorBackground(clrMediumSeaGreen); //--- Set the background color
   obj_Btn_CLOSE_ALL_BUY.ColorBorder(clrWhite); //--- Set the border color
   obj_Btn_CLOSE_ALL_BUY.Text("Close All Buy"); //--- Set the button text
   obj_Btn_CLOSE_ALL_BUY.Color(clrBlack); //--- Set the text color
   obj_Btn_CLOSE_ALL_BUY.Font("Calibri bold"); //--- Set the font style
   obj_Btn_CLOSE_ALL_BUY.FontSize(14); //--- Set the font size

   //--- CLOSE LOSS SELL BUTTON
   obj_Btn_CLOSE_LOSS_SELL.Create(0, Btn_CLOSE_LOSS_SELL, 0, 40, 180, 0, 0); //--- Create the close loss sell button
   obj_Btn_CLOSE_LOSS_SELL.Size(140, 25); //--- Set the button size
   obj_Btn_CLOSE_LOSS_SELL.ColorBackground(clrSalmon); //--- Set the background color
   obj_Btn_CLOSE_LOSS_SELL.ColorBorder(clrWhite); //--- Set the border color
   obj_Btn_CLOSE_LOSS_SELL.Text("Close Loss Sell"); //--- Set the button text
   obj_Btn_CLOSE_LOSS_SELL.Color(clrBlack); //--- Set the text color
   obj_Btn_CLOSE_LOSS_SELL.Font("Calibri bold"); //--- Set the font style
   obj_Btn_CLOSE_LOSS_SELL.FontSize(14); //--- Set the font size

   //--- CLOSE LOSS BUY BUTTON
   obj_Btn_CLOSE_LOSS_BUY.Create(0, Btn_CLOSE_LOSS_BUY, 0, 190, 180, 0, 0); //--- Create the close loss buy button
   obj_Btn_CLOSE_LOSS_BUY.Size(140, 25); //--- Set the button size
   obj_Btn_CLOSE_LOSS_BUY.ColorBackground(clrMediumSeaGreen); //--- Set the background color
   obj_Btn_CLOSE_LOSS_BUY.ColorBorder(clrWhite); //--- Set the border color
   obj_Btn_CLOSE_LOSS_BUY.Text("Close Loss Buy"); //--- Set the button text
   obj_Btn_CLOSE_LOSS_BUY.Color(clrBlack); //--- Set the text color
   obj_Btn_CLOSE_LOSS_BUY.Font("Calibri bold"); //--- Set the font style
   obj_Btn_CLOSE_LOSS_BUY.FontSize(14); //--- Set the font size

   //--- CLOSE PROFIT SELL BUTTON
   obj_Btn_CLOSE_PROFIT_SELL.Create(0, Btn_CLOSE_PROFIT_SELL, 0, 40, 210, 0, 0); //--- Create the close profit sell button
   obj_Btn_CLOSE_PROFIT_SELL.Size(140, 25); //--- Set the button size
   obj_Btn_CLOSE_PROFIT_SELL.ColorBackground(clrSalmon); //--- Set the background color
   obj_Btn_CLOSE_PROFIT_SELL.ColorBorder(clrWhite); //--- Set the border color
   obj_Btn_CLOSE_PROFIT_SELL.Text("Close Profit Sell"); //--- Set the button text
   obj_Btn_CLOSE_PROFIT_SELL.Color(clrBlack); //--- Set the text color
   obj_Btn_CLOSE_PROFIT_SELL.Font("Calibri bold"); //--- Set the font style
   obj_Btn_CLOSE_PROFIT_SELL.FontSize(14); //--- Set the font size

   //--- CLOSE PROFIT BUY BUTTON
   obj_Btn_CLOSE_PROFIT_BUY.Create(0, Btn_CLOSE_PROFIT_BUY, 0, 190, 210, 0, 0); //--- Create the close profit buy button
   obj_Btn_CLOSE_PROFIT_BUY.Size(140, 25); //--- Set the button size
   obj_Btn_CLOSE_PROFIT_BUY.ColorBackground(clrMediumSeaGreen); //--- Set the background color
   obj_Btn_CLOSE_PROFIT_BUY.ColorBorder(clrWhite); //--- Set the border color
   obj_Btn_CLOSE_PROFIT_BUY.Text("Close Profit Buy"); //--- Set the button text
   obj_Btn_CLOSE_PROFIT_BUY.Color(clrBlack); //--- Set the text color
   obj_Btn_CLOSE_PROFIT_BUY.Font("Calibri bold"); //--- Set the font style
   obj_Btn_CLOSE_PROFIT_BUY.FontSize(14); //--- Set the font size

   //--- CLOSE ALL LOSS BUTTON
   obj_Btn_CLOSE_ALL_LOSS.Create(0, Btn_CLOSE_ALL_LOSS, 0, 40, 240, 0, 0); //--- Create the close all loss button
   obj_Btn_CLOSE_ALL_LOSS.Size(140, 25); //--- Set the button size
   obj_Btn_CLOSE_ALL_LOSS.ColorBackground(clrSalmon); //--- Set the background color
   obj_Btn_CLOSE_ALL_LOSS.ColorBorder(clrWhite); //--- Set the border color
   obj_Btn_CLOSE_ALL_LOSS.Text("CLOSE LOSS"); //--- Set the button text
   obj_Btn_CLOSE_ALL_LOSS.Color(clrBlack); //--- Set the text color
   obj_Btn_CLOSE_ALL_LOSS.Font("Calibri bold"); //--- Set the font style
   obj_Btn_CLOSE_ALL_LOSS.FontSize(14); //--- Set the font size

   //--- CLOSE ALL PROFIT BUTTON
   obj_Btn_CLOSE_ALL_PROFIT.Create(0, Btn_CLOSE_ALL_PROFIT, 0, 190, 240, 0, 0); //--- Create the close all profit button
   obj_Btn_CLOSE_ALL_PROFIT.Size(140, 25); //--- Set the button size
   obj_Btn_CLOSE_ALL_PROFIT.ColorBackground(clrMediumSeaGreen); //--- Set the background color
   obj_Btn_CLOSE_ALL_PROFIT.ColorBorder(clrWhite); //--- Set the border color
   obj_Btn_CLOSE_ALL_PROFIT.Text("CLOSE PROFIT"); //--- Set the button text
   obj_Btn_CLOSE_ALL_PROFIT.Color(clrBlack); //--- Set the text color
   obj_Btn_CLOSE_ALL_PROFIT.Font("Calibri bold"); //--- Set the font style
   obj_Btn_CLOSE_ALL_PROFIT.FontSize(14); //--- Set the font size

   //--- CLOSE ALL PENDING BUTTON
   obj_Btn_CLOSE_PENDING.Create(0, Btn_CLOSE_PENDING, 0, 80, 270, 0, 0); //--- Create the close all pending button
   obj_Btn_CLOSE_PENDING.Size(210, 25); //--- Set the button size
   obj_Btn_CLOSE_PENDING.ColorBackground(clrPeru); //--- Set the background color
   obj_Btn_CLOSE_PENDING.ColorBorder(clrWhite); //--- Set the border color
   obj_Btn_CLOSE_PENDING.Text("Close All Pending"); //--- Set the button text
   obj_Btn_CLOSE_PENDING.Color(clrBlack); //--- Set the text color
   obj_Btn_CLOSE_PENDING.Font("Calibri bold"); //--- Set the font style
   obj_Btn_CLOSE_PENDING.FontSize(14); //--- Set the font size
}
初期化イベントハンドラでは、取引セクションの関数呼び出しロジックをコメントアウトし、関数呼び出しを介してクローズセクションに影響を与えることができます。後で再度再利用する必要があるため、関数を削除するのではなくコメントアウトすることでこれを実現します。
   // BODY OF THE PANEL
   //createSection_Trade(); //--- Call function to create the trade section
   createSection_Close(); //--- Call function to create the close section
プログラムを実行すると、次のような出力が得られます。

うまくいきました。次に、取引口座に関連する情報を表示する最後のセクションの作成に進みます。このためにも関数を使用します。
//+------------------------------------------------------------------+
//|        FUNCTION TO CREATE THE INFO SECTION                       |
//+------------------------------------------------------------------+
void createSection_Information() {
   //--- Create Account Number Label
   obj_Lbl_ACC_NUMBER.Create(0, Lbl_ACC_NUMBER, 0, 40, 100, 0, 0); //--- Initialize label for Account Number
   obj_Lbl_ACC_NUMBER.Text("Account Number"); //--- Set label text to "Account Number"
   obj_Lbl_ACC_NUMBER.Color(clrWhite); //--- Set label color to white
   obj_Lbl_ACC_NUMBER.Font("Calibri bold"); //--- Set label font to Calibri bold
   obj_Lbl_ACC_NUMBER.FontSize(14); //--- Set label font size to 14

   //--- Create Account Number Button
   obj_Btn_ACC_NUMBER.Create(0, Btn_ACC_NUMBER, 0, 40 + 140, 100 + 2, 0, 0); //--- Initialize button for Account Number
   obj_Btn_ACC_NUMBER.Size(150, 20); //--- Set button size to 150x20
   obj_Btn_ACC_NUMBER.ColorBackground(clrGainsboro); //--- Set button background color to Gainsboro
   obj_Btn_ACC_NUMBER.ColorBorder(clrWhite); //--- Set button border color to white
   obj_Btn_ACC_NUMBER.Text(IntegerToString(AccountInfoInteger(ACCOUNT_LOGIN))); //--- Set button text with account number
   obj_Btn_ACC_NUMBER.Color(clrBlack); //--- Set button text color to black
   obj_Btn_ACC_NUMBER.Font("Calibri bold"); //--- Set button font to Calibri bold
   obj_Btn_ACC_NUMBER.FontSize(13); //--- Set button font size to 13

}
情報セクションの作成でも同様の形式を使用します。ただし、テキストを設定する際には、いくつかの追加機能を使用するので、その本質について説明したいと思います。明瞭性を高めるために、線は黄色で強調表示されます。AccountInfoInteger関数とIntegerToString関数の組み合わせを使用して、obj_Btn_ACC_NUMBERボタンのテキストを設定し、口座番号を表示します。
指定されたパラメータに基づいて特定の口座情報を取得するには、AccountInfoInteger関数を使用します。この場合、パラメータはACCOUNT_LOGINであり、MetaTrader端末から口座のログイン番号を取得するように関数に指示します。このログイン番号は整数値として返されます。
次に、IntegerToString関数を適用して、この整数値を文字列に変換します。これは、ボタンのTextメソッドでは、値を適切に表示するために文字列形式にする必要があるため必要です。この変換をおこなわないと、ボタンは口座番号を正しく表示できません。同様の形式で、口座名ボタンとタイプボタンを設定します。
   //--- Create Account Name Label
   obj_Lbl_ACC_NAME.Create(0, Lbl_ACC_NAME, 0, 40, 125, 0, 0); //--- Initialize label for Account Name
   obj_Lbl_ACC_NAME.Text("Account Name"); //--- Set label text to "Account Name"
   obj_Lbl_ACC_NAME.Color(clrWhite); //--- Set label color to white
   obj_Lbl_ACC_NAME.Font("Calibri bold"); //--- Set label font to Calibri bold
   obj_Lbl_ACC_NAME.FontSize(14); //--- Set label font size to 14

   //--- Create Account Name Button
   obj_Btn_ACC_NAME.Create(0, Btn_ACC_NAME, 0, 40 + 120, 125 + 2, 0, 0); //--- Initialize button for Account Name
   obj_Btn_ACC_NAME.Size(170, 20); //--- Set button size to 170x20
   obj_Btn_ACC_NAME.ColorBackground(clrGainsboro); //--- Set button background color to Gainsboro
   obj_Btn_ACC_NAME.ColorBorder(clrWhite); //--- Set button border color to white
   obj_Btn_ACC_NAME.Text(AccountInfoString(ACCOUNT_SERVER)); //--- Set button text with account server name
   obj_Btn_ACC_NAME.Color(clrBlack); //--- Set button text color to black
   obj_Btn_ACC_NAME.Font("Calibri bold"); //--- Set button font to Calibri bold
   obj_Btn_ACC_NAME.FontSize(13); //--- Set button font size to 13

   //--- Create Account Type Label
   obj_Lbl_ACC_TYPE.Create(0, Lbl_ACC_TYPE, 0, 40, 150, 0, 0); //--- Initialize label for Account Type
   obj_Lbl_ACC_TYPE.Text("Account Type"); //--- Set label text to "Account Type"
   obj_Lbl_ACC_TYPE.Color(clrWhite); //--- Set label color to white
   obj_Lbl_ACC_TYPE.Font("Calibri bold"); //--- Set label font to Calibri bold
   obj_Lbl_ACC_TYPE.FontSize(14); //--- Set label font size to 14

   //--- Create Account Type Button
   obj_Btn_ACC_TYPE.Create(0, Btn_ACC_TYPE, 0, 40 + 110, 150 + 2, 0, 0); //--- Initialize button for Account Type
   obj_Btn_ACC_TYPE.Size(180, 20); //--- Set button size to 180x20
   obj_Btn_ACC_TYPE.ColorBackground(clrGainsboro); //--- Set button background color to Gainsboro
   obj_Btn_ACC_TYPE.ColorBorder(clrWhite); //--- Set button border color to white
   ENUM_ACCOUNT_TRADE_MODE account_type = (ENUM_ACCOUNT_TRADE_MODE)AccountInfoInteger(ACCOUNT_TRADE_MODE); //--- Retrieve account type
   string trade_mode; //--- Initialize variable for trade mode description
   switch (account_type) { //--- Determine account type
      case ACCOUNT_TRADE_MODE_DEMO: trade_mode = "Demo Account"; break; //--- Set trade_mode for Demo account
      case ACCOUNT_TRADE_MODE_CONTEST: trade_mode = "Contest Account"; break; //--- Set trade_mode for Contest account
      default: trade_mode = "Real Account"; break; //--- Set trade_mode for Real account
   }
   obj_Btn_ACC_TYPE.Text(trade_mode); //--- Set button text to account type description
   obj_Btn_ACC_TYPE.Color(clrBlack); //--- Set button text color to black
   obj_Btn_ACC_TYPE.Font("Calibri bold"); //--- Set button font to Calibri bold
   obj_Btn_ACC_TYPE.FontSize(13); //--- Set button font size to 13
ここでは、口座名ボタンとタイプボタンを設定します。ただし、口座タイプを直接取得する方法がないため、口座タイプを取得するには、より複雑なロジックを使用します。ロジックは強調するために黄色で再度強調表示されます。まず、列挙型ENUM_ACCOUNT_TRADE_MODEのaccount_typeという名前の変数を定義します。これは、デモ、コンテスト、リアル口座タイプなどのさまざまな口座取引モードを保持するために特別に設計された列挙データ型です。次に、ACCOUNT_TRADE_MODEパラメータとAccountInfoInteger関数を使用して値を割り当てます。この関数は、口座の現在の取引モードを列挙された整数として取得します。
次に、口座の種類に基づいて説明ラベルを保持するために、trade_modeという名前の文字列変数を宣言します。次に、switch文を使用して、account_typeの値を確認し、口座の種類を決定します。このswitch文には3つのケースがあります。
- ACCOUNT_TRADE_MODE_DEMO:口座がデモ口座の場合、trade_modeは「デモ口座」に設定されます。
- ACCOUNT_TRADE_MODE_CONTEST:口座がコンテストで使用される場合、trade_modeは「コンテスト口座」に設定されます。
- デフォルトのケース:その他のタイプ(通常はリアル口座)の場合、trade_modeは「リアル口座」に設定されます。
最後に、obj_Btn_ACC_TYPEボタンのTextメソッドを呼び出し、trade_mode文字列を渡します。これにより、ボタンのテキストが更新され、説明的な口座タイプが表示されます。ここから、残りのユーティリティは次のような同様の形式で定義されます。
   //--- Create Account Leverage Label
   obj_Lbl_ACC_LEVERAGE.Create(0, Lbl_ACC_LEVERAGE, 0, 40, 175, 0, 0); //--- Initialize label for Account Leverage
   obj_Lbl_ACC_LEVERAGE.Text("Account Leverage"); //--- Set label text to "Account Leverage"
   obj_Lbl_ACC_LEVERAGE.Color(clrWhite); //--- Set label color to white
   obj_Lbl_ACC_LEVERAGE.Font("Calibri bold"); //--- Set label font to Calibri bold
   obj_Lbl_ACC_LEVERAGE.FontSize(14); //--- Set label font size to 14

   //--- Create Account Leverage Button
   obj_Btn_ACC_LEVERAGE.Create(0, Btn_ACC_LEVERAGE, 0, 40 + 150, 175 + 2, 0, 0); //--- Initialize button for Account Leverage
   obj_Btn_ACC_LEVERAGE.Size(140, 20); //--- Set button size to 140x20
   obj_Btn_ACC_LEVERAGE.ColorBackground(clrGainsboro); //--- Set button background color to Gainsboro
   obj_Btn_ACC_LEVERAGE.ColorBorder(clrWhite); //--- Set button border color to white
   obj_Btn_ACC_LEVERAGE.Text(IntegerToString(AccountInfoInteger(ACCOUNT_LEVERAGE))); //--- Set button text with account leverage
   obj_Btn_ACC_LEVERAGE.Color(clrBlack); //--- Set button text color to black
   obj_Btn_ACC_LEVERAGE.Font("Calibri bold"); //--- Set button font to Calibri bold
   obj_Btn_ACC_LEVERAGE.FontSize(13); //--- Set button font size to 13

   //--- Create Account Equity Label
   obj_Lbl_ACC_EQUITY.Create(0, Lbl_ACC_EQUITY, 0, 40, 220, 0, 0); //--- Initialize label for Account Equity
   obj_Lbl_ACC_EQUITY.Text("Account Equity"); //--- Set label text to "Account Equity"
   obj_Lbl_ACC_EQUITY.Color(clrAqua); //--- Set label color to Aqua
   obj_Lbl_ACC_EQUITY.Font("Cooper Black"); //--- Set label font to Cooper Black
   obj_Lbl_ACC_EQUITY.FontSize(14); //--- Set label font size to 14

   //--- Create Account Equity Button
   obj_Btn_ACC_EQUITY.Create(0, Btn_ACC_EQUITY, 0, 40 + 170, 220 + 2, 0, 0); //--- Initialize button for Account Equity
   obj_Btn_ACC_EQUITY.Size(120, 20); //--- Set button size to 120x20
   obj_Btn_ACC_EQUITY.ColorBackground(clrBlack); //--- Set button background color to black
   obj_Btn_ACC_EQUITY.ColorBorder(clrBlanchedAlmond); //--- Set button border color to Blanched Almond
   obj_Btn_ACC_EQUITY.Text(DoubleToString(AccountInfoDouble(ACCOUNT_EQUITY), 2)); //--- Set button text with account equity
   obj_Btn_ACC_EQUITY.Color(clrWhite); //--- Set button text color to white
   obj_Btn_ACC_EQUITY.Font("Times new roman bold"); //--- Set button font to Times New Roman bold
   obj_Btn_ACC_EQUITY.FontSize(13); //--- Set button font size to 13

   //--- Create Account Balance Label
   obj_Lbl_ACC_BALANCE.Create(0, Lbl_ACC_BALANCE, 0, 40, 245, 0, 0); //--- Initialize label for Account Balance
   obj_Lbl_ACC_BALANCE.Text("Account Balance"); //--- Set label text to "Account Balance"
   obj_Lbl_ACC_BALANCE.Color(clrAqua); //--- Set label color to Aqua
   obj_Lbl_ACC_BALANCE.Font("Cooper Black"); //--- Set label font to Cooper Black
   obj_Lbl_ACC_BALANCE.FontSize(14); //--- Set label font size to 14

   //--- Create Account Balance Button
   obj_Btn_ACC_BALANCE.Create(0, Btn_ACC_BALANCE, 0, 40 + 170, 245 + 2, 0, 0); //--- Initialize button for Account Balance
   obj_Btn_ACC_BALANCE.Size(120, 20); //--- Set button size to 120x20
   obj_Btn_ACC_BALANCE.ColorBackground(clrBlack); //--- Set button background color to black
   obj_Btn_ACC_BALANCE.ColorBorder(clrBlanchedAlmond); //--- Set button border color to Blanched Almond
   obj_Btn_ACC_BALANCE.Text(DoubleToString(AccountInfoDouble(ACCOUNT_BALANCE), 2)); //--- Set button text with account balance
   obj_Btn_ACC_BALANCE.Color(clrWhite); //--- Set button text color to white
   obj_Btn_ACC_BALANCE.Font("Times new roman bold"); //--- Set button font to Times New Roman bold
   obj_Btn_ACC_BALANCE.FontSize(13); //--- Set button font size to 13

   //--- Create Server Time Label
   obj_Lbl_TIME.Create(0, Lbl_TIME, 0, 40, 270, 0, 0); //--- Initialize label for Server Time
   obj_Lbl_TIME.Text("Server Time"); //--- Set label text to "Server Time"
   obj_Lbl_TIME.Color(clrLime); //--- Set label color to Lime
   obj_Lbl_TIME.Font("Cooper Black"); //--- Set label font to Cooper Black
   obj_Lbl_TIME.FontSize(14); //--- Set label font size to 14

   //--- Create Server Time Button
   obj_Btn_TIME.Create(0, Btn_TIME, 0, 40 + 120, 270 + 2, 0, 0); //--- Initialize button for Server Time
   obj_Btn_TIME.Size(170, 20); //--- Set button size to 170x20
   obj_Btn_TIME.ColorBackground(clrBlack); //--- Set button background color to black
   obj_Btn_TIME.ColorBorder(clrBlanchedAlmond); //--- Set button border color to Blanched Almond
   obj_Btn_TIME.Text(TimeToString(TimeTradeServer(), TIME_DATE | TIME_SECONDS)); //--- Set button text with server time
   obj_Btn_TIME.Color(clrWhite); //--- Set button text color to white
   obj_Btn_TIME.Font("Times new roman bold"); //--- Set button font to Times New Roman bold
   obj_Btn_TIME.FontSize(13); //--- Set button font size to 13
それだけのことです。変更の効果を確認するには、初期化段階で関数を呼び出し、他のナビゲーション関数の呼び出しをコメントアウトする必要があります。これは次のようになります。
   // BODY OF THE PANEL
   //createSection_Trade(); //--- Call function to create the trade section
   //createSection_Close(); //--- Call function to create the close section
   createSection_Information(); //--- Call function to create the information section
プログラムをコンパイルして実行すると、次の出力が得られます。

これで、必要なパネルユーティリティコンポーネントがすべて揃いました。ボタンがアクティブになっているため、取引アクティビティの元のインターフェイスをデフォルトに戻すことができます。したがって、closeおよびinformationセクション関数はコメントアウトしますが、後でそれぞれのビューフィールドが必要になったときに必要になります。したがって、パネルインターフェイスの作成を担当する最終的な初期化コードは次のようになります。
//+------------------------------------------------------------------+
//| Expert initialization function                                   |
//+------------------------------------------------------------------+
int OnInit() {
   //--- Start of the initialization function

   //--- MAIN BUTTON
   obj_Btn_MAIN.Create(0, Btn_MAIN, 0, 30, 30, 0, 0); //--- Create the main button at specified coordinates
   //obj_Btn_MAIN.Width(310); //--- (Commented out) Set width of the main button
   //obj_Btn_MAIN.Height(300); //--- (Commented out) Set height of the main button
   obj_Btn_MAIN.Size(310, 300); //--- Set size of the main button
   obj_Btn_MAIN.ColorBackground(C'070,070,070'); //--- Set background color of the main button
   obj_Btn_MAIN.ColorBorder(clrBlack); //--- Set border color of the main button

   //--- HEADER BUTTON
   obj_Btn_HEADER.Create(0, Btn_HEADER, 0, 30, 30, 0, 0); //--- Create the header button at specified coordinates
   obj_Btn_HEADER.Size(310, 25); //--- Set size of the header button
   obj_Btn_HEADER.ColorBackground(clrLightBlue); //--- Set background color of the header button
   obj_Btn_HEADER.ColorBorder(clrBlack); //--- Set border color of the header button

   //--- X BUTTON
   obj_Btn_X.Create(0, Btn_X, 0, 30 + 280, 30 + 1, 0, 0); //--- Create the close button (X) at specified coordinates
   obj_Btn_X.Size(30 - 1, 25 - 1 - 1); //--- Set size of the close button
   obj_Btn_X.ColorBackground(clrLightBlue); //--- Set background color of the close button
   obj_Btn_X.ColorBorder(clrLightBlue); //--- Set border color of the close button
   obj_Btn_X.Text(CharToString(255)); //--- Set the close button text to an "X" character
   obj_Btn_X.Color(clrBlack); //--- Set text color of the close button
   obj_Btn_X.Font("Wingdings"); //--- Set font of the close button to Wingdings
   obj_Btn_X.FontSize(17); //--- Set font size of the close button

   //--- HEADER LABEL
   obj_Lbl_HEADER.Create(0, Lbl_HEADER, 0, 40, 30, 0, 0); //--- Create the header label at specified coordinates
   obj_Lbl_HEADER.Text("Control Panel"); //--- Set text of the header label
   obj_Lbl_HEADER.Color(clrRed); //--- Set text color of the header label
   obj_Lbl_HEADER.Font("Cooper black"); //--- Set font of the header label to Cooper Black
   obj_Lbl_HEADER.FontSize(14); //--- Set font size of the header label

   //--- TRADE BUTTON
   obj_Btn_TRADE.Create(0, Btn_TRADE, 0, 40, 60, 0, 0); //--- Create the trade button at specified coordinates
   obj_Btn_TRADE.Size(90, 30); //--- Set size of the trade button
   obj_Btn_TRADE.ColorBackground(clrYellow); //--- Set background color of the trade button
   obj_Btn_TRADE.ColorBorder(clrYellow); //--- Set border color of the trade button
   obj_Btn_TRADE.Text("Trade"); //--- Set text of the trade button
   obj_Btn_TRADE.Color(clrBlack); //--- Set text color of the trade button
   obj_Btn_TRADE.Font("Arial Black"); //--- Set font of the trade button to Arial Black
   obj_Btn_TRADE.FontSize(13); //--- Set font size of the trade button

   //--- CLOSE BUTTON
   obj_Btn_CLOSE.Create(0, Btn_CLOSE, 0, 40 + obj_Btn_TRADE.Width() + 10, 60, 0, 0); //--- Create the close button at specified coordinates
   obj_Btn_CLOSE.Size(90, 30); //--- Set size of the close button
   obj_Btn_CLOSE.ColorBackground(clrSilver); //--- Set background color of the close button
   obj_Btn_CLOSE.ColorBorder(clrSilver); //--- Set border color of the close button
   obj_Btn_CLOSE.Text("Close"); //--- Set text of the close button
   obj_Btn_CLOSE.Color(clrBlack); //--- Set text color of the close button
   obj_Btn_CLOSE.Font("Arial Black"); //--- Set font of the close button to Arial Black
   obj_Btn_CLOSE.FontSize(13); //--- Set font size of the close button

   //--- INFO BUTTON
   obj_Btn_INFO.Create(0, Btn_INFO, 0, 40 + obj_Btn_TRADE.Width() + 10 + obj_Btn_CLOSE.Width() + 10, 60, 0, 0); //--- Create the info button at specified coordinates
   obj_Btn_INFO.Size(90, 30); //--- Set size of the info button
   obj_Btn_INFO.ColorBackground(clrSilver); //--- Set background color of the info button
   obj_Btn_INFO.ColorBorder(clrSilver); //--- Set border color of the info button
   obj_Btn_INFO.Text("Inform'n"); //--- Set text of the info button
   obj_Btn_INFO.Color(clrBlack); //--- Set text color of the info button
   obj_Btn_INFO.Font("Arial Black"); //--- Set font of the info button to Arial Black
   obj_Btn_INFO.FontSize(13); //--- Set font size of the info button

   // BODY OF THE PANEL
   createSection_Trade(); //--- Call function to create the trade section
   //createSection_Close(); //--- (Commented out) Call function to create the close section
   //createSection_Information(); //--- (Commented out) Call function to create the information section

   //--- FOOTER BUTTON
   obj_Btn_FOOTER.Create(0, Btn_FOOTER, 0, 30 + 1, 305 - 1, 0, 0); //--- Create the footer button at specified coordinates
   obj_Btn_FOOTER.Size(310 - 1 - 1, 25); //--- Set size of the footer button
   obj_Btn_FOOTER.ColorBackground(C'070,070,070'); //--- Set background color of the footer button
   obj_Btn_FOOTER.ColorBorder(C'070,070,070'); //--- Set border color of the footer button
   obj_Btn_FOOTER.Text(ShortToString(0x23F0) + "https://t.me/Forex_Algo_Trader"); //--- Set text of the footer button with a link
   obj_Btn_FOOTER.Color(clrWhite); //--- Set text color of the footer button
   obj_Btn_FOOTER.Font("Calibri bold italic"); //--- Set font of the footer button to Calibri bold italic
   obj_Btn_FOOTER.FontSize(12); //--- Set font size of the footer button

   ChartRedraw(0); //--- Redraw the chart to update the panel

   //--- End of initialization function
   return(INIT_SUCCEEDED); //--- Return initialization success status
}
最終的なマイルストーンの出力は次のとおりです。

必要なコンポーネントを作成しましたが、プログラムをチャートから削除したら、作成したすべてのコンポーネントを削除する必要があります。これを実現する最善の方法は、作成したセクションごとに関数を作成し、それらを使用してセクションを同時に削除し、再利用できるようにすることです。私たちは秩序を保つつもりです。建物の解体を例にとると、基礎工事に進む前に、まず外装材を取り除き、次に間仕切りを取り除き、最後に上層階を取り除くのが合理的です。はい、誰でも始めることができますが、プロとして物事をおこなう方がプロフェッショナルです。あなたも同意すると思います。関数は次のとおりです。
//--- Function to destroy main panel objects
void destroySection_Main_Panel() {
   obj_Btn_MAIN.Destroy(); //--- Destroy the main button
   obj_Btn_HEADER.Destroy(); //--- Destroy the header button
   obj_Btn_X.Destroy(); //--- Destroy the close (X) button
   obj_Lbl_HEADER.Destroy(); //--- Destroy the header label
   obj_Btn_TRADE.Destroy(); //--- Destroy the trade section button
   obj_Btn_CLOSE.Destroy(); //--- Destroy the close section button
   obj_Btn_INFO.Destroy(); //--- Destroy the information section button
   obj_Btn_FOOTER.Destroy(); //--- Destroy the footer button
}

//--- Function to destroy trade section objects
void destroySection_Trade() {
   obj_Btn_RISK.Destroy(); //--- Destroy the risk button
   obj_Edit_RISK.Destroy(); //--- Destroy the risk input field
   obj_Lbl_PRICE.Destroy(); //--- Destroy the price label
   obj_Edit_PRICE.Destroy(); //--- Destroy the price input field
   obj_Lbl_LOTS.Destroy(); //--- Destroy the lot size label
   obj_Edit_LOTS.Destroy(); //--- Destroy the lot size input field
   obj_Lbl_SL.Destroy(); //--- Destroy the stop loss label
   obj_Edit_SL.Destroy(); //--- Destroy the stop loss input field
   obj_Lbl_TP.Destroy(); //--- Destroy the take profit label
   obj_Edit_TP.Destroy(); //--- Destroy the take profit input field
   obj_Btn_POINTS.Destroy(); //--- Destroy the points button
   obj_Btn_SELL.Destroy(); //--- Destroy the sell button
   obj_Btn_ENTRY.Destroy(); //--- Destroy the entry button
   obj_Btn_BUY.Destroy(); //--- Destroy the buy button
   obj_Btn_SELLSTOP.Destroy(); //--- Destroy the sell stop button
   obj_Btn_BUYSTOP.Destroy(); //--- Destroy the buy stop button
   obj_Btn_SELLLIMIT.Destroy(); //--- Destroy the sell limit button
   obj_Btn_BUYLIMIT.Destroy(); //--- Destroy the buy limit button
}

//--- Function to destroy close section objects
void destroySection_Close() {
   obj_Btn_CLOSE_ALL.Destroy(); //--- Destroy the button to close all positions
   obj_Btn_CLOSE_ALL_SELL.Destroy(); //--- Destroy the button to close all sell positions
   obj_Btn_CLOSE_ALL_BUY.Destroy(); //--- Destroy the button to close all buy positions
   obj_Btn_CLOSE_LOSS_SELL.Destroy(); //--- Destroy the button to close losing sell positions
   obj_Btn_CLOSE_LOSS_BUY.Destroy(); //--- Destroy the button to close losing buy positions
   obj_Btn_CLOSE_PROFIT_SELL.Destroy(); //--- Destroy the button to close profitable sell positions
   obj_Btn_CLOSE_PROFIT_BUY.Destroy(); //--- Destroy the button to close profitable buy positions
   obj_Btn_CLOSE_ALL_LOSS.Destroy(); //--- Destroy the button to close all losing positions
   obj_Btn_CLOSE_ALL_PROFIT.Destroy(); //--- Destroy the button to close all profitable positions
   obj_Btn_CLOSE_PENDING.Destroy(); //--- Destroy the button to close pending orders
}

//--- Function to destroy information section objects
void destroySection_Information() {
   obj_Lbl_ACC_NUMBER.Destroy(); //--- Destroy the account number label
   obj_Btn_ACC_NUMBER.Destroy(); //--- Destroy the account number button
   obj_Lbl_ACC_NAME.Destroy(); //--- Destroy the account name label
   obj_Btn_ACC_NAME.Destroy(); //--- Destroy the account name button
   obj_Lbl_ACC_TYPE.Destroy(); //--- Destroy the account type label
   obj_Btn_ACC_TYPE.Destroy(); //--- Destroy the account type button
   obj_Lbl_ACC_LEVERAGE.Destroy(); //--- Destroy the account leverage label
   obj_Btn_ACC_LEVERAGE.Destroy(); //--- Destroy the account leverage button
   obj_Lbl_ACC_EQUITY.Destroy(); //--- Destroy the account equity label
   obj_Btn_ACC_EQUITY.Destroy(); //--- Destroy the account equity button
   obj_Lbl_ACC_BALANCE.Destroy(); //--- Destroy the account balance label
   obj_Btn_ACC_BALANCE.Destroy(); //--- Destroy the account balance button
   obj_Lbl_TIME.Destroy(); //--- Destroy the server time label
   obj_Btn_TIME.Destroy(); //--- Destroy the server time button
}
ここでは、それぞれのオブジェクトを使用し、Destroyメソッドを呼び出して特定の要素を削除します。その後、OnDeinitイベントハンドラの関数を呼び出します。
//+------------------------------------------------------------------+
//| Expert deinitialization function                                 |
//+------------------------------------------------------------------+
void OnDeinit(const int reason) {
   //--- Start of the deinitialization function

   destroySection_Main_Panel(); //--- Call function to destroy the main panel section
   destroySection_Trade(); //--- Call function to destroy the trade section
   destroySection_Close(); //--- Call function to destroy the close section
   destroySection_Information(); //--- Call function to destroy the information section

   ChartRedraw(0);

   //--- End of deinitialization function
}
うまくいきました。それぞれのナビゲーションボタンと本体コンポーネントを使用して、必要なパネルを作成しました。これで、この連載記事の第1回の目的は完了です。次に、ボタンをライブにして、必要に応じてクリックや自動更新に応答するようにする必要があります。これは、後続の分割払いで処理される予定です。
結論
この記事では、Controlsクラスを使用してインタラクティブなMetaQuotes Language 5 (MQL5)ダッシュボードパネルを作成するための基本構造の設定に焦点を当てました。ボタン、ラベル、編集フィールドなどの重要なコンポーネントを段階的に作成し、各要素が明確に定義され、視覚的にスタイル設定されていることを確認しました。さらに、テキスト、色、サイズをカスタマイズして、パネルにプロフェッショナルで統一感のある外観を作成する方法についても説明します。この構造化されたアプローチを通じて、特定の取引要件に基づいて拡張および適応できる、完全に機能するインターフェイスのコアを構築しました。
次の回では、応答性とインタラクティブ性を追加してこのパネルを強化し、MetaTrader 5でのユーザー入力と取引アクションに動的に反応できるようにします。ボタンクリックイベントをプログラムし、リアルタイムのデータ更新を管理し、フィードバックメカニズムを実装してパネルの使いやすさを向上させる方法について説明します。このアップグレードにより、現在の静的インターフェイスが、シームレスな取引エクスペリエンスを提供する強力なリアルタイム取引アシスタントに変わります。ご期待ください。
MetaQuotes Ltdにより英語から翻訳されました。
元の記事: https://www.mql5.com/en/articles/16084
 スマートマネーコンセプト(オーダーブロック)とフィボナッチ指標を組み合わせた最適な取引エントリー方法
 Connexusの本体(第4回):HTTP本体サポートの追加
- 無料取引アプリ
- 8千を超えるシグナルをコピー
- 金融ニュースで金融マーケットを探索